- Steve Bogash and Gary Shafer

Managing soil nutrient levels is the first step in creating an abundance of high quality produce or crops. The first step in this process is pre-plant soil testing nutrients followed by the application of nutrients based on the test results.
Many fertilizer outlets or consultants offer soil sampling services, and on larger farming operations is often money well spent, if you prefer to get your hands in your soil, or have smaller areas to sample it is easy to do this yourself. Keep in mind though, that the information from a soil analysis is only as good as the material that is sent to the lab. Therefore, collecting a high quality sample is paramount in this process.
We are often asked if performing a soil analysis on an annual basis is necessary. The answer can depend on what it is you are wanting from the analysis itself. If there are no problem areas in the field, and you keep good records as to fertilizer applied each season, and crop yield being removed, then you can do fairly good calculations for future fertility needs. In this instance it may not be necessary to sample more than every three or four years. If you are sampling to determine some major nutrient deficiency, or the field has specific production problems, and example being calcium deficiency, it is often beneficial to sample annually until the specific nutrient level is within the desired range.
Another good reason to sample yourself is that while sampling you can also get a reasonable idea as to relatively shallow compaction areas that could be robbing you of potential yield. You can make a note of areas where it was difficult to push your soil probe to the desired sample depth, and then plan to incorporate tillage operations to lessen compaction.
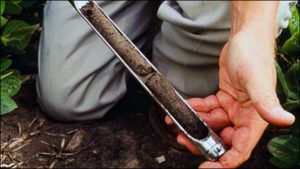
The use of a soil probe makes collecting your soil samples substantially easier. These relatively inexpensive tools will last a lifetime and are available from most outdoor product suppliers. Check out suppliers like Gemplers, Ben Meadows, Forestry Suppliers, and A.M. Leonard. Be sure to get a soil probe that is long enough to allow for samples to be taken while standing up. It is so much easier!
In general, the more soil samples taken in a given field the better results will be. A little presampling planning is in order vs just running out to the given plot and starting to punch holes with a probe. Consider any changes in soil type or recent past use as these may require breaking a field up into smaller parcels for testing. Soil type greatly influences available minerals, so different soil types should be tested separately. Every past crop will have removed specific nutrients and every future crop will have different requirements, so parceling a field may be necessary for the best results.
Rather than just randomly running about a field, it is better to bisect a field by picking a landmark, then pulling samples every few paces as you cross the field by picking a landmark, then pulling samples every few paces as you cross the field. For horticultural crops, collect 6-8” deep cores. Larger fields may require several trips to get a good representative sample. Collect at least 10 cores per acre for horticultural crops. Smaller areas that are used to grow many crops may require many cores in order to collect a good sample. Once your soil is collected, dump it onto newspaper to dry. Remove rocks, obvious organic debris and break the sample up into small pieces. After drying for several days, return the sample to a bucket, mix it thoroughly, then fill the sample bag to the marked depth. Most soil labs provide recommendations based on well-published data, so fill out their sample questionnaire as accurately and completely as possible. Once your results come back, you’ve got a blueprint for your pre-plant nutrient applications. Don’t hesitate to talk to your ISP Tech crop advisor in order to plan for the best season ever.
